How to Organize Photos and Videos for Content Creation
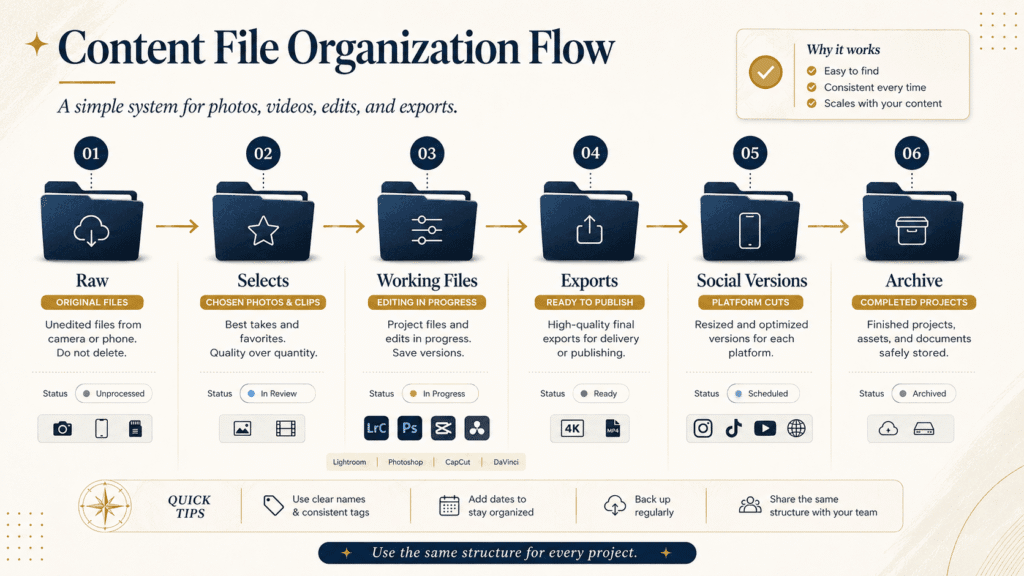
If you want to know how to organize photos and videos for content creation, start by giving every project one clear folder. This guide shows you a simple folder structure, a clear file naming system, a backup habit, and how to set up your tools.

Quick Answer: Use One Project Folder for Every Content Project
The easiest way to organize your photos and videos is to keep every project inside one folder.
In that folder, separate the raw files.
Keep working files, final exports, social media versions, and archives apart too.
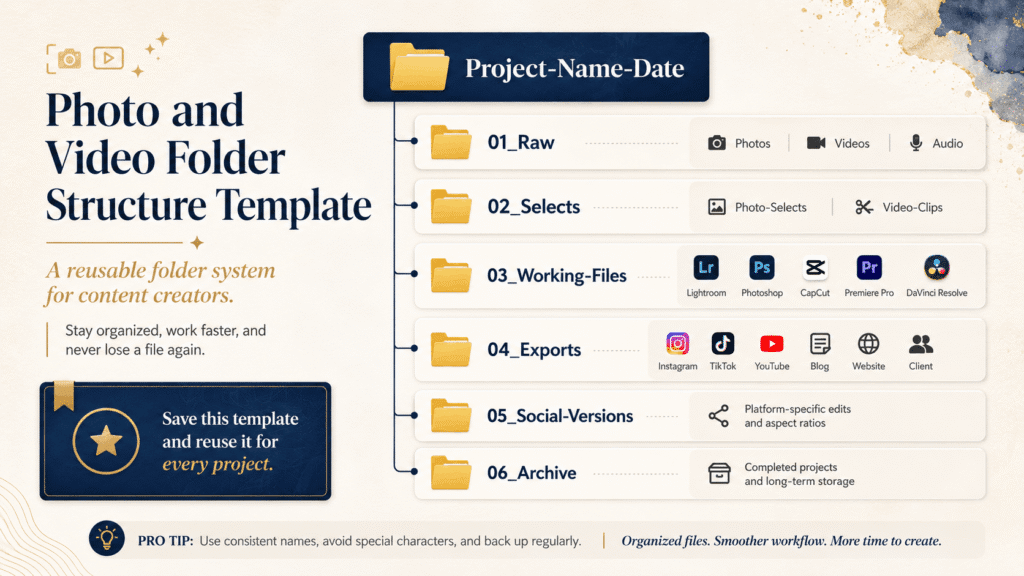
📁 Example folder structure:
Project-Name-Date
├── 01_Raw
├── 02_Selects
├── 03_Working-Files
├── 04_Exports
├── 05_Social-Versions
└── 06_Archive
Here is what each folder does:
| Folder | What Goes Inside |
|---|---|
| Working-Files | Lightroom, Photoshop, CapCut, Premiere Pro, or DaVinci files |
| Raw | Original photos, videos, audio, and camera files |
| Selects | Chosen photos or usable video clips |
| Exports | Final files ready for posting, website use, or client delivery |
| Social-Versions | Instagram, TikTok, YouTube Shorts, blog, or website versions |
| Archive | Completed project files for future backup or reuse |
The goal is simple.
You should know where every file belongs before you start editing.
Why Photos and Videos Become Hard to Manage in Your Content Creation Process
Most creators do not lose time because they lack ideas.
They lose time because their files are everywhere.
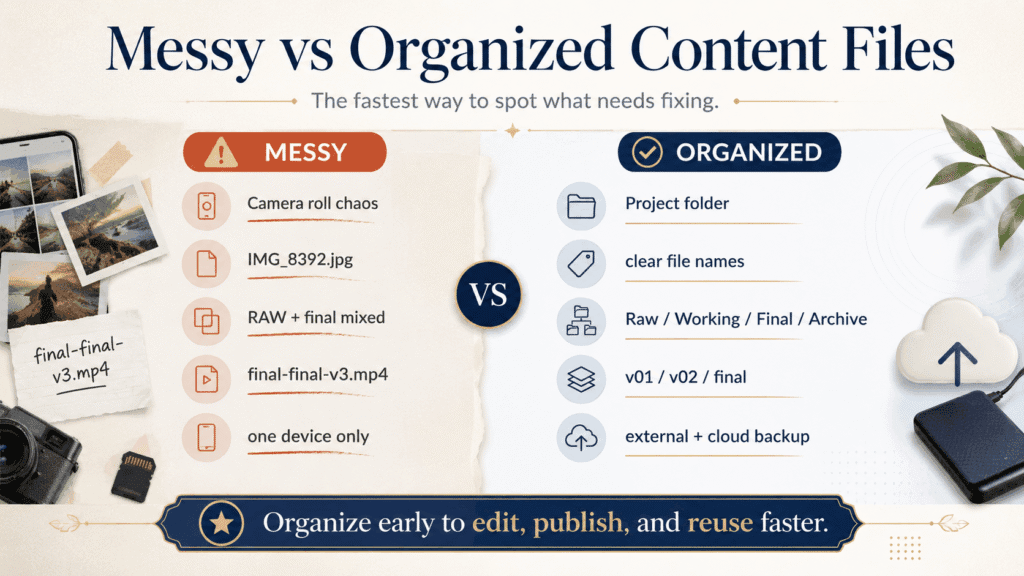
Common problems:
- Photos stay in the camera roll.
- Videos stay inside the phone or SD card.
- RAW files and final exports are mixed together.
- File names look like IMG_8392.jpg.
- Final versions become final-final-v3-real-final.mp4.
- Instagram, TikTok, website, and client files are all in one folder.
- Nobody knows which file is the latest version.
This gets worse when you create content often.
One photoshoot can become:
| Original Content | Possible Versions |
|---|---|
| Photoshoot | Instagram post, website image, blog image, portfolio image |
| Short video | TikTok, Reel, YouTube Short, story clip |
| Behind-the-scenes clip | Reel, carousel, case study, social proof post |
| Client project | Delivery files, web-size images, archive copy |
If you do not organize files early, the mess follows you into editing, publishing, and delivery.
Use a Simple Folder Structure for Digital Asset Organization
A good folder structure should be repeatable for consistency.
Do not create a new system every time.
Start with the same main folders for every content project.
01 - Raw Files
Keep original files here.
This includes:
- RAW photos
- JPEGs from camera or phone
- original video files
- audio recordings
- screen recordings
- downloaded assets
- reference files
⚠️ Do not edit directly inside this folder.
Raw files are your safety copy.
02 - Selects
Keep chosen files here.
For photos, this may include selected images.
For videos, this may include usable clips or best takes.
This folder helps you avoid editing everything.
✅ Move only useful files into this folder.
03 - Working Files
Keep editing files here.
Examples:
| File Type | Example |
|---|---|
| Lightroom | catalog or exported edit folder |
| Photoshop | PSD files |
| CapCut | project files or exported drafts |
| Premiere Pro | project files |
| DaVinci Resolve | project files or database export |
| Canva | design exports or templates |
This folder is for files that are still in progress.
04 - Exports
Keep finished files here.
These are files ready to post, upload, send, or deliver.
Examples:
- Instagram image
- TikTok video
- YouTube Shorts file
- website banner
- blog image
- client delivery file
Do not mix exports with raw files.
05 - Social Versions
Use this folder when one piece of content becomes multiple formats.
For example:
| Platform | Version |
|---|---|
| Feed, carousel, Reel cover | |
| TikTok | vertical video |
| YouTube | Short, thumbnail |
| Blog | compressed image |
| Website | hero image, portfolio image |
This is useful when you repurpose content.
06 - Archive
Move completed projects here.
Archive files are not active anymore.
They are saved for backup, future reuse, or reference.
A project is not finished until it is archived.
How to Organize Photos for Content Creation
Photos should be organized by usage, not just by date.
A photo can be used for social media, website, blog, portfolio, ads, or client delivery.
📸 Example photo folder setup:
Photos
├── RAW
├── Selects
├── Edited
├── Web-Size
├── High-Resolution
└── Archive
Here is how to use each folder:
| Photo Folder | Use It For |
|---|---|
| Selects | Chosen images worth editing |
| RAW | Original camera or phone files |
| Edited | Finished edited images |
| Web-Size | Compressed images for website or blog |
| High-Resolution | Large files for client delivery or print |
| Archive | Completed photo project storage |
Keep RAW files clean.
Keep edited files separate.
Keep website files smaller and named clearly.
This makes your photo content easier to publish, reuse, and deliver.
How to Organize Video Files for Content Creation
Video files need better structure.
They often contain footage, audio, music, subtitles, project files, and exports.
Start by moving videos off your phone, camera, or SD card.
Do not let important footage stay in one device.
🎥 Example video folder setup:
Videos
├── Raw-Footage
├── Audio
├── Music
├── Project-Files
├── Exports
├── Short-Form-Cuts
└── Archive
Here is what each folder does:
| Video Folder | Use It For |
|---|---|
| Raw-Footage | Original clips from camera or phone |
| Audio | Voice recordings, interviews, sound files |
| Music | Licensed music or background tracks |
| Project-Files | CapCut, Premiere Pro, or DaVinci files |
| Exports | Final video exports |
| Short-Form-Cuts | TikTok, Reels, Shorts, and story versions |
| Archive | Completed video project backup |
Keep your video files inside the project folder.
If the project file and footage are separated, your editing app may lose the file path.
That creates missing media problems.
Use a Simple File Naming System for Digital Content Files
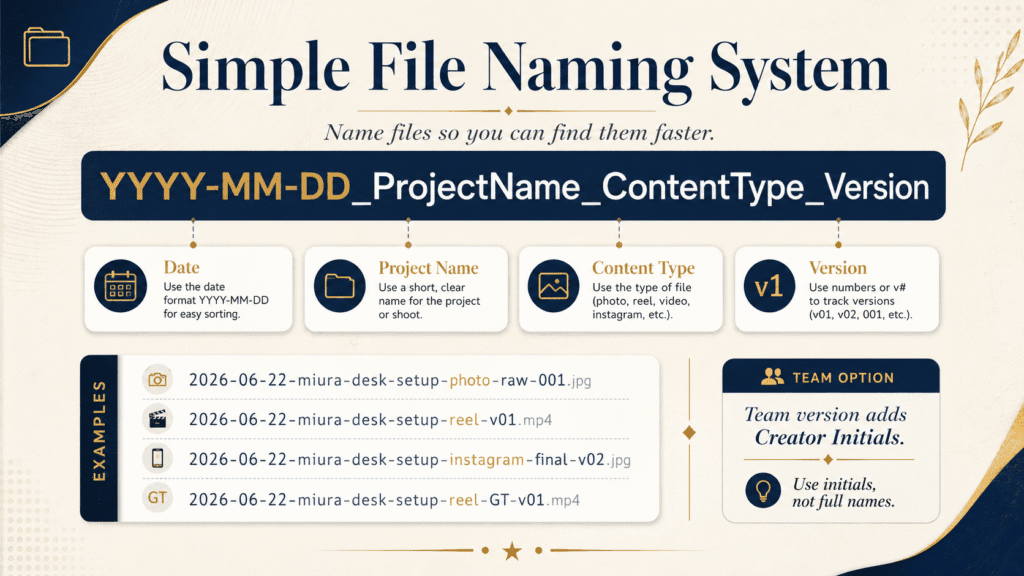
A good file name should tell you what the file is before you open it.
✍️ File naming formula:
YYYY-MM-DD_ProjectName_ContentType_Version
✅ Better file name examples:
- 2026-06-22-miura-desk-setup-photo-raw-001.jpg
- 2026-06-22-miura-desk-setup-reel-v01.mp4
- 2026-06-22-miura-desk-setup-instagram-final-v02.jpg
- 2026-06-22-miura-desk-setup-website-hero.jpg
If you work with a team, add creator or editor initials.
Use initials, not full names.
YYYY-MM-DD_ProjectName_ContentType_CreatorInitials_Version
Examples:
- 2026-06-22-miura-desk-setup-reel-GT-v01.mp4
- 2026-06-22-miura-desk-setup-photo-JY-final.jpg
- 2026-06-22-miura-desk-setup-website-hero-GT-v02.jpg
Use this only when it helps.
If you are working solo, keep the file name shorter.
If many people touch the same file, initials help track who created or edited it.
Separate Raw, Working, Final, and Archive Files in Your Workflow
The cleanest content file organization system uses four layers.
| Layer | Meaning |
|---|---|
| Raw | Original files that should stay untouched |
| Working | Files you are editing or preparing |
| Final | Files ready to publish or deliver |
| Archive | Completed project files stored for later |
This prevents common mistakes.
❌ Avoid editing inside your raw folder.
Do not export final files into your working folder.
Do not leave old projects mixed with active work.
A well-organized file system helps you see the project status quickly.
Organize Social Media Content by Platform
One file is rarely enough.
One project can need many versions.
These include Instagram, TikTok, YouTube, a blog, a website, and client delivery.
Create export folders by platform.
Example:
| Platform | What to Save |
|---|---|
| Feed images, carousel images, Reel covers | |
| TikTok | vertical video exports |
| YouTube | Shorts, thumbnail files |
| Blog | compressed images, screenshots, graphics |
| Website | hero images, portfolio images, web-size files |
| Client | high-resolution and web-size delivery files |
This avoids confusion.
You should not need to ask, “Which one did I upload?”
The folder should answer that for you.
Tools That Help You Organize Your Content
Tools help, but they do not replace a clear system.
Start with folders first.
Then choose the right tools that support your process.
| Purpose | Useful Tools |
|---|---|
| Cloud storage | Google Drive, Dropbox, OneDrive |
| Local backup | External hard drive, SSD |
| Photo organization | Adobe Lightroom, Adobe Bridge |
| Video editing files | CapCut, Premiere Pro, DaVinci Resolve |
| Planning | Notion, Trello, Google Sheets |
| Design assets | Canva, Illustrator |
| Content management | WordPress media library |
Use tools based on your actual work.
If you mostly create social media content, Google Drive and CapCut may be enough.
If you handle photo-heavy work, Adobe Lightroom helps with digital asset management.
If you work with a team, use a shared folder and clear naming rules.
Do not add tools before fixing your folder system.
A messy creator with more software will still be messy.
Back Up Your Photos and Videos With a Hard Drive and Cloud Storage
Your content is not safe if it exists in only one place.
💾 Simple backup setup:
- Main working copy
- External drive backup
- Cloud backup
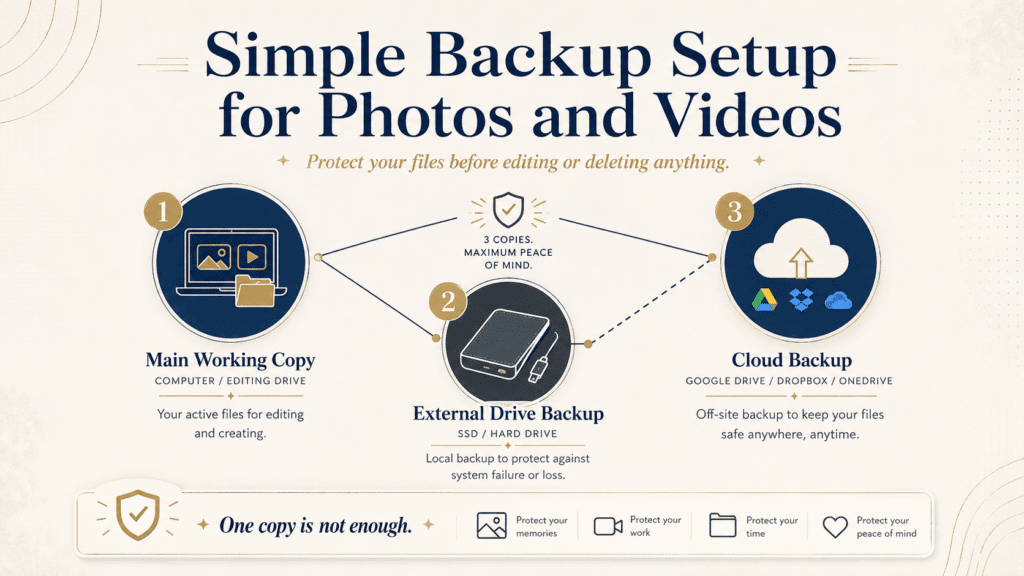
A practical setup:
| Copy | Where It Lives |
|---|---|
| Working copy | Computer or editing drive |
| Local backup | External hard drive or SSD |
| Cloud backup | Google Drive, Dropbox, or OneDrive |
Back up before you delete anything from your camera, SD card, or phone.
This matters most for video files.
Videos are larger.
They are also harder to recreate.
If you lose a photo, you may still have similar shots.
If you lose a key video clip, the whole edit may break.
Common File Organization Mistakes Content Creators Make
Avoid these mistakes before your content system becomes harder to fix.
1. Keeping Everything in Your Camera Roll
This makes content hard to find.
Fix: Move files into project folders after every shoot.
2. Mixing Raw Files With Final Exports
This creates confusion.
Fix: Separate raw, working, final, and archive files.
3. Using Random File Names
Names like IMG_8392.jpg do not help later.
Fix: Use date, project name, content type, and version.
4. Saving Everything on One Device
One device can fail.
Fix: Use an external drive or cloud storage backup.
5. Creating Too Many Final Versions
This creates final-final-final chaos.
Fix: Use version numbers like v01, v02, and final.
6. Not Archiving Old Projects
Old projects can clutter active folders.
Fix: Move completed projects into an archive folder.
Keep Your Content Files Organized Efficiently Each Week
You do not need to organize every file every day.
A simple weekly routine is enough.
✅ Weekly file maintenance checklist:
- Move new photos and videos out of your phone or camera
- Put files into the correct project folder
- Delete obvious duplicates or unusable files
- Separate raw files, selects, working files, and exports
- Rename important final files
- Back up active projects
- Archive completed projects
Do this once a week if you create content regularly.
It keeps your system from becoming heavy.
Small maintenance is easier than cleaning months of chaos later.
Folder Structure Template for Content Creators
Use this structure as your starting point.
Start with this simple flow:
Project Folder → Raw → Selects → Working Files → Exports → Social Versions → Archive
Organize each folder like this: This setup works for most content projects.
You can use it for:
- Photoshoots
- Video shoots
- Social media content
- Blog images
- Website visuals
- Client work
For a more detailed version, use the folder structure template below.
Save it and reuse it whenever you start a new content project.
Conclusion: The Simple Way to Keep Your Content Files Organized
Messy content files usually come from one problem: Your files do not have a clear place to go.
Create one clean project folder for each shoot, video, campaign, or content batch.
In that folder, sort your files into these groups:
- Raw files
- Selects
- Working files
- Final exports
- Social versions
- Archive
Use this as your quick fix:
- Camera roll chaos → move photos and videos into a project folder.
- Mixed RAW and final files → separate raw, working, final, and archive files.
- Too many final versions → use names like v01, v02, and final.
- Content for many platforms → create export folders for Instagram, TikTok, YouTube, blog, website, and client delivery.
- Fear of losing files → back up to an external drive or cloud storage.
- Team handoff issues → add creator or editor initials when needed.
Do not start by fixing every old folder.
Start with your next project.
Create the folder first.
Import your files into the right place.
Edit, export, back up, and archive inside the same system.
When this becomes a habit, your content will be easier to find, edit, publish, reuse, deliver, and protect.
The fastest way to start is simple: Create one folder template.
Use it for your next content project.
Repeat it every time.
Frequently Asked Questions
How do I organize photos and videos for content creation?
Create one project folder for each content project. Inside it, separate raw files, selects, working files, exports, social versions, and archives. Use clear file names and back up files before editing.
What is the best folder structure for content creators?
A simple structure is Raw, Selects, Working Files, Exports, Social Versions, and Archive. This applies to photos, videos, social media posts, blog images, website files, and client deliveries.
Should I store photos and videos together or separately?
Store everything in the same project folder. Separate files into different folders for photos and videos. This keeps the full project together while still making each file type easy to find.
How should I name photo and video files?
Use a file naming system with date, project name, content type, and version. For example: 2026-06-22-miura-desk-setup-reel-v01.mp4. If you work with a team, you can add creator or editor initials.
What tools can help me organize content?
Google Drive, Dropbox, and external hard drives are useful. Lightroom and Adobe Bridge help with photos. CapCut, Premiere Pro, and DaVinci Resolve work well for video editing. Notion, Trello, and Google Sheets are great for organization. Start with a folder system before adding more tools.
How do I avoid losing photo and video files?
Back up important files in at least two places. Keep one working copy on your computer or editing drive. Keep another copy on an external drive or cloud storage. Back up before deleting files from your camera, phone, or SD card.

Miura Visual
Transforming visuals into content, stories, and scalable value across platforms and audiences.
Related Article